Saturday, October 29, 2011

Classroom Incentive Board

Hello out there in Cyber Space!
I have been very busy with school and doing some fun crafting to motivate my kiddos.  We all know that kids live for motivation, competition and fun.  Well, they have to learn 120 sight words and we want them to be motivated and learn them as quickly as they can.  The other teachers have in the past created progressions on the outside wall where they can show off their progress.  Well my teachers assistant said that they in the past she had thought of a racing theme.  Once she said that my Cricut light bulb came on!  All of a sudden I had an idea of Cars running through my head.  So it was then time for the adventure to begin.  My mom and I created 23 different cars and I made a race track.  The students will race from Pit Stop to Pit Stop as they learn their sight words.  I then also created blimps to fly above with their names.  These will then be used in January when we start AR. 


Thanks so much for looking!  I can't wait until Monday when the fun begins.
Happy Creating!!!!

Monday, September 19, 2011

Cricut Banner for HSN Contest

So this past weekend I finally got some crafting done.  HSN is hosting a contest in which people have to make a banner that spells out Cricut.  I have seen some peoples banners and all I can say is, WOW!  But I had mine out in the mail before I saw many of these amazing banners.  I did the designing of this using my Gypsy which puts every cartridge that you own at your own finger tips.  I finished the banner and then listed the cartridges that I used on the back.  I was amazed after listing them that I used 6 cartridges in the making of this project.  Here are some pictures of the banner that I sent in, here's to hoping that it gets there in 2 days.

Here is the whole banner.  I did not have a cartridge with a banner that I really liked the shape of.  So I did take a banner that I liked the shape of and welded basic shapes to create that same shape.  I then welded and grouped those shapes together.  The letters are Gypsy Fornt and after I cut them I used Copic markers to add some color.  The dangles are made by overlapping different base images from Cricut Everyday and drawing on Shrinky Dinks.  I then used colored pencils to color in the images.  The ribbon is plain white ribbon that I colored using Copic markers.

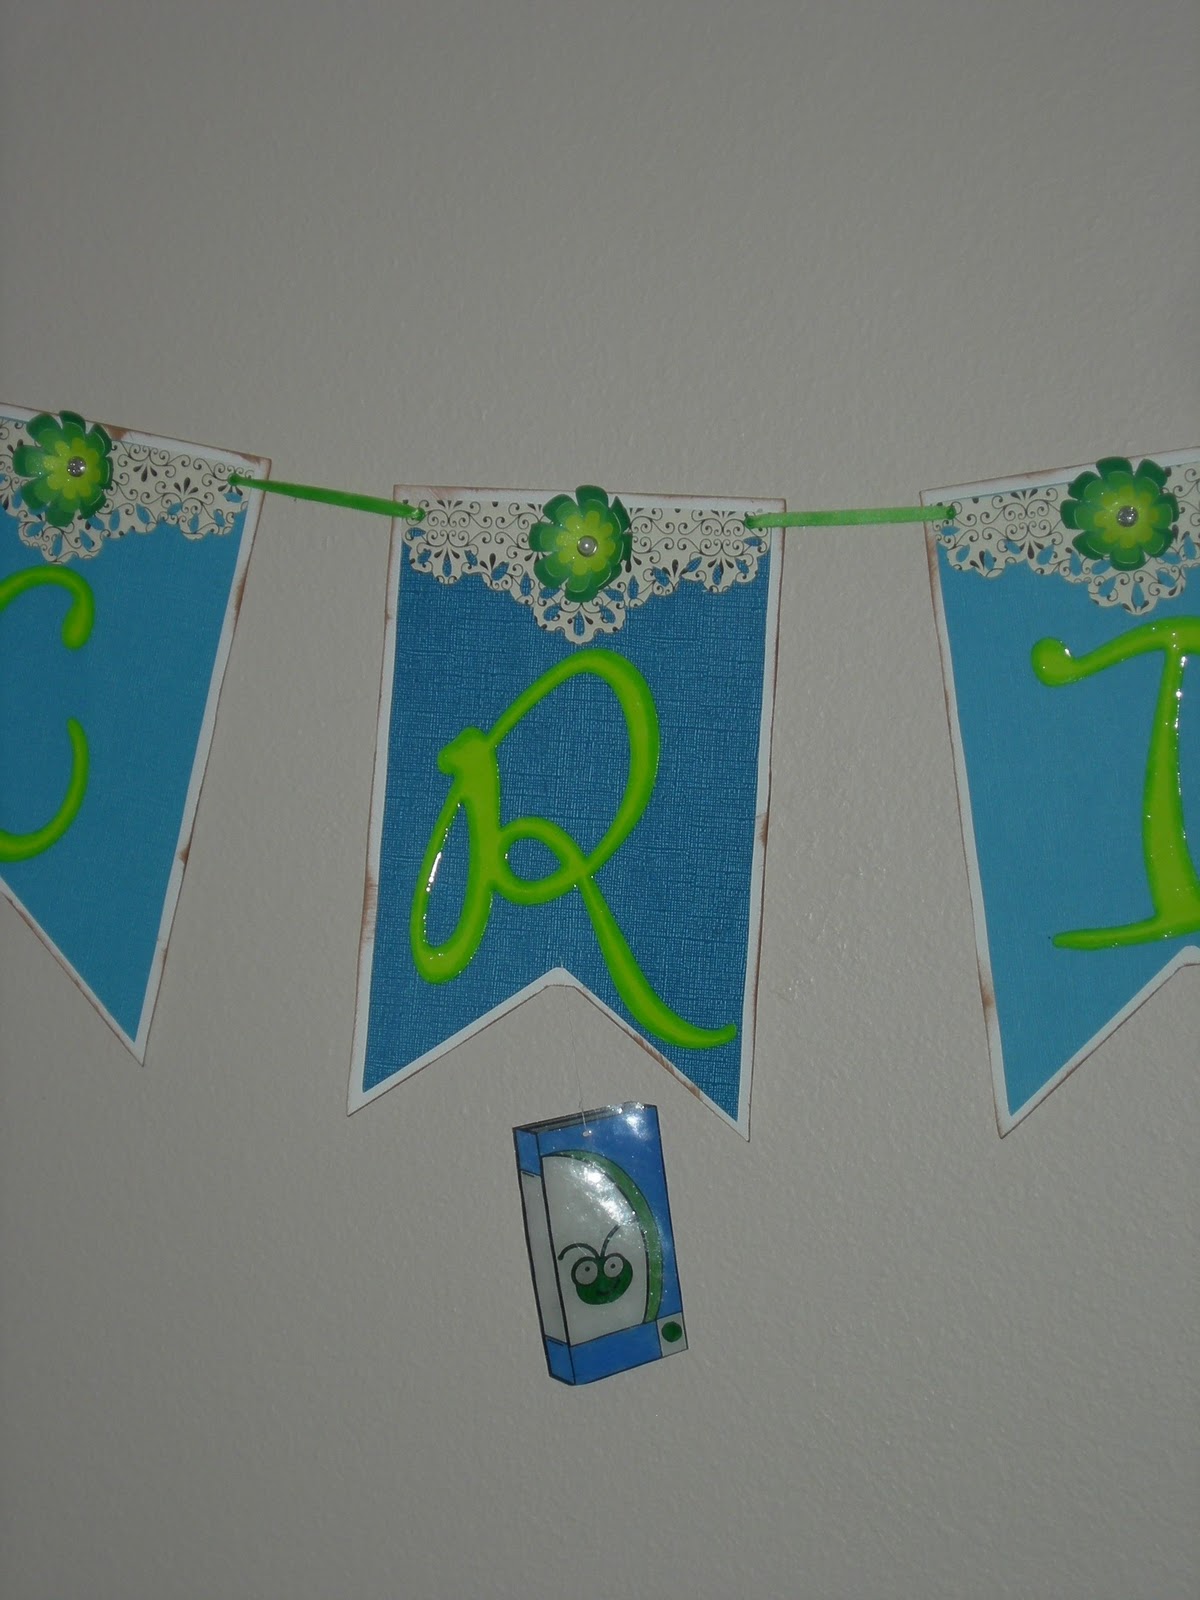
Here is a close up of the R and the Cricut box.  The letters look shiney and that is because all of them are coated with Liquid Glass.

Here is a close up of the Cricut Box Shrinky Dink.

Here we have the I and C pennant with the Cricut Expression hanging from them.

A close up of the Expression

Finally the letter U with a cartridge hanging from it.

A close up of the final Shrinky Dink

Every pennant had a border that I made welding shapes on Elegant Edges.  The flowers are paper made with Tags Bags and Boxes.  I cut them at 2', 1.5" and 1".  I then curled the edges, punched them and added a gem or pearl brad.  They were then sprayed with Pearl Glimmer Mist to add more sparkle.

This was a very fun contest to enter but it was hard to send it off.  I am glad I have the patterns on my Gypsy in case I want to make on for my craft room.

Happy Creating!
Cassie

Is it a boy or a girl?

So my brother and sister-in-law are expecting their third little one.  They currently have 2 boys and were hoping to complete their family with a little girl.  They decided that they wanted to do something different and mail some sort of announcement.  The conversation began when we were talking about the new craze of making pink or blue cakes that you cut into to find out the sex of the baby.  I enjoy making cakes as well as my crafting and scrapping.  But of course we could not send cakes across the country.  So, I was going to come up with a cake like type of decoration.  My mom started brain storming ideas with me and lets just say she comes up with good ideas but wow were some of them complicated!  We tried a few ideas and nothing quite looked right.  I then remembered a class that I took with Cindy Royal (Thanks Cindy!) at the Cricut Stampede.  I tried to explain it to my mother and she was really questioning it.  Then the next day I found the example I made in class and I showed her and she loved it.  So there we went and we got started.
Now the tricky part is that we were going to make 8 and many of the people knew she was going to be finding out and wanted to know right away.  So the fact that we are in Mississippi and we have a good bit of family in CA I needed to get them prepped and out as quickly as possible.  So, to make things easier I created 8 undecorated bases and 8 sets of decorations for both boy and girl.  That way once we found out I could whip them up that night (OK, it still took 6-7 hours so it still took most of that night) and then get them out in the post early the next day.  We really enjoyed how they turned out and it was a fun way to discover the news.

So just like the surprise cakes I made the outside completely neutral so that the person receiving it only discovers if it is a boy or a girl when opening up the box.

Once you pull off the lid the sides open up and there are standing items on little plastic pieces.  There is then a tea light with flowers around the flame.  This is designed to look like a mini cake so the recipients do get a cake after all!

Here I had the flash on so some of the colors are a little washed.  You can see that I have the flame turned on.

I used Storybook and Sugar and Spice for the pop ups.

Another shot of the inside and the little girl.

Here we have the baby carriage.

Thank you so much Cindy for this idea, I am so glad I took your class.  My brother and sister-in-law loved the goodies that they got to send out.  Thanks so much for your looking!
Happy crafting,
Cassie


More Classroom Decorations

I am soooo sorry that I have been so MIA these past few months.  With school having started in August I am spending most of my time on things for my class.  I did create some items for my classroom but never got on here to post.  I know some of you had seen my color chart and wanted to see what else I had in store for my class.  Here I am going to just post a few of the pictures so that you can see some of the decorations.  As I posted before I decided to make my theme Robotz and thought it was quite fitting with the fact that we have a specific Robot cartridge.  Hope some of these ideas may offer some inspiration for you teachers out there.


Here we have a far off shot of the wall.  You can see the color chart, calendar, months, days of the week and the word wall.
 Here is a picture of the robot word wall.

 This is a close up of the robots for the word wall.  The vowels are done in red and the consonants are yellow.

Here is the birthday wall.  I have since added candles with the name written down the candle and the date written on the flame.

Here is a closer picture of the cupcakes.

My robot discipline chart.  Every student has a star on magnets that they move if they have a hard day.

Here I have my reading wall Robotz.  The words and the stars were already there so I decided to leave them and just accent them with Robotz.


Thanks for looking!
Happy Crafting,
Cassie

Saturday, July 23, 2011

Classroom Decorations, Part One

So, I am so thrilled to have my own classroom and have been hoping for this for a number of years!  However, also being crafty I have always known that I wanted my classroom to have some of my own crafty, creative flair. I have been battling for the last few weeks on what type of theme I have wanted in my classroom.  Yesterday, I was in Dollar Tree rummaging through their classroom decorations and wanting just a simple border for my white board.  This was when I came across a cute Robot border.  At first I thought about how that was not my theme, but then I realized it would be perfect.  After all, I do own the Robotz cartridge and there would be so many possibilities. 

The first project that I completed was a color chart.  I created 5" cuts of 12 different Robots and each of them focused on a specific color.  I then also cut out the color name and glued it below the corresponding Robot.  I am so excited to see how my classroom will end up.


Happy Creating!
Cassie

Friday, July 15, 2011

Rooster Wine Markers

So, I finally got my first ever 1 cent item at Michaels.  A co-worker of mine just recently had a birthday and I asked her good friend what she liked and she told me roosters.  Well, of all the stamps that I have, I was almost positive I didn't have a rooster.  So,  I stopped at Michaels and saw a stamp but it was $8.50 which I didn't really want to spend on a stamp that I may not use again.  After searching for a bit I saw a bucket that said $3 and under.  In there I found a worn rooster so I decided to get it and that the price would be better.  I went up to pay and surprise, 1 cent!

Well, I have made wine markers before but this time I did it slightly different.  Rather than using ear wires I just formed them using wire and pliers.  I then used some white shrinky dink material and stamped the rooster using Staz On Ink.  I then used CTMH colored pencils to color in the watering can and parts of the rooster.  After hole punching the plastic I then used the plastic I then used my embossing gun to shrink it up.

Next, I decided to make a holder for the wine markers.  A good friend of mine got married a few years ago and made wine markers in a case as her favor.  I used that wedding favor as an example to create my own.  I used Autumn Terracotta CTMH paper and scored it in 3 places to create a sort of matchbook.  I then also used my Gypsy to create the holder to insert the wine charms into.  Finally I stamped and colored a rooster on Colonial White paper and added on some distressed ink to add dimension and glued it onto the front.


Tuesday, June 7, 2011

Teacher gift created by a wonderful class

Well, as I stated I had been busy working in a classroom as the teacher was out on maternity leave.  This is the third maternity leave that I have been a substitute for.  Well, a tradition that I have started for myself is to have students in the class write stories in which to create a book for the baby.  So this year I had the 2nd graders write fairy tales for their teacher's baby.  This book I must say is my favorite book of the three that I had been a part of.  I must give credit where credit is due and a good part of it is due to Provo Craft's wonderful creation, Your Story!  I have had the Your Story for well over a year and have just started using it for mementos in the last 2 months and I am beginning to LOVE it!  The final product was adorable and was enjoyed by the students in the class as well as many of the staff members who were able to look at it. 


Copics are such wonderful creations!

So, how many of you have discovered the wonderful joy of Copic markers?  I must say that they are the worlds best marker and they can make anyone feel like an artist.  Well, I love using them and I love finding the perfect stamps to color.  One of my favorite stamps to use with copics are the Greeting Farms stamps.  Their images are wonderful, adorable, and so fun to color!  Well, I used my stamps and copics to make some thank you cards for people that I worked with.  Although all the cards have a similar feel by being a tri-fold cards with 1 image as a focus I was happy with how they turned out.  I also used my old friend Cuttlebug to add some embossing and textured flare to the card.